
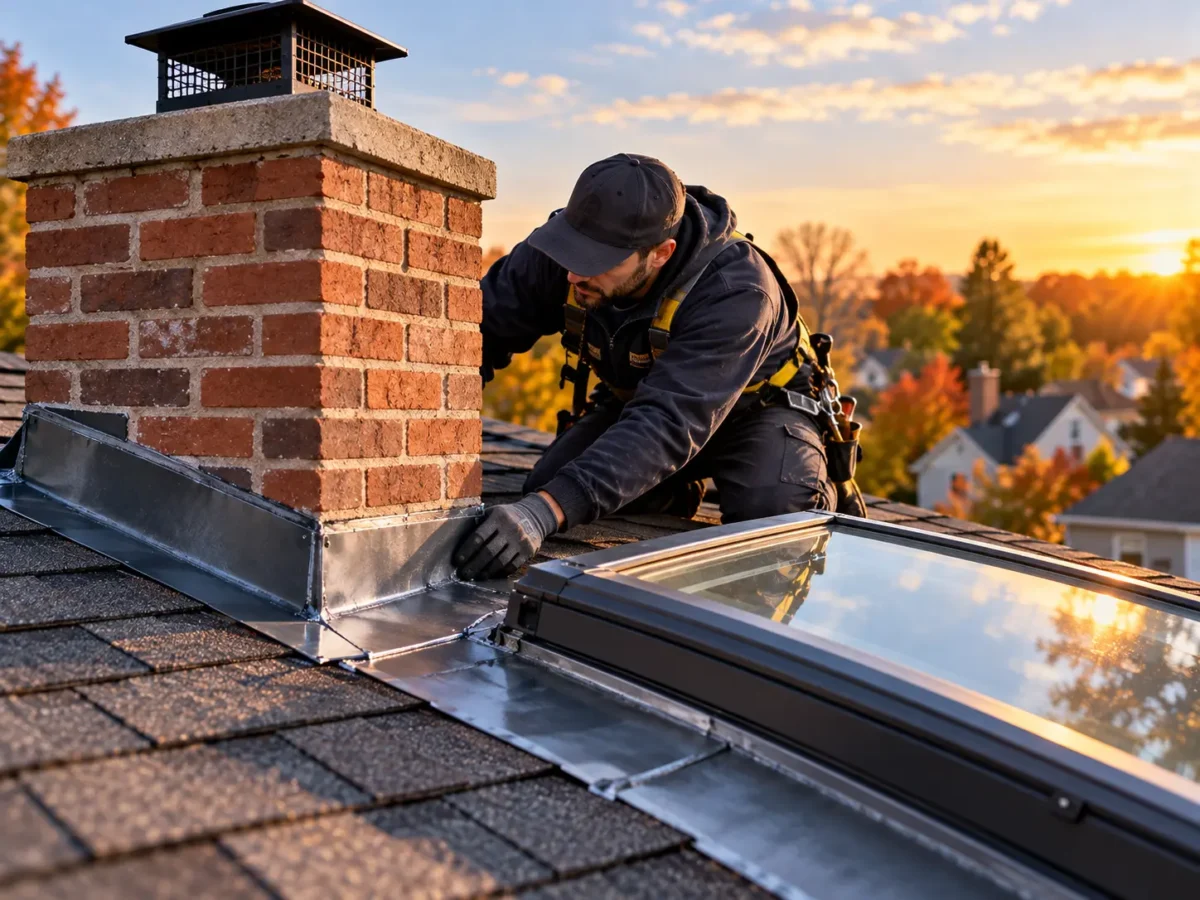
If you ask a Bucks County roofer what single component causes the most winter water entry calls, the answer is almost always the same: flashing. Not shingles. Not the field of the roof. The metal at the transitions—where the roof meets the chimney, where the skylight frame meets the surrounding surface, where a dormer wall intersects the roof plane. Those joints are where water finds its way in, and in Pennsylvania’s winter, they are tested harder than at any other time of year.
Most homeowners inspect their shingles and gutters when they think about fall roof maintenance. Flashing gets overlooked because it’s harder to see, harder to interpret, and not something most people have been taught to look for. That gap in attention is exactly why flashing failure is so common by the time a homeowner notices a problem—the failure has usually been developing for months or years before the first interior stain appears.
Franco Roofing, Inc. has been inspecting and repairing flashing on homes throughout Bucks County, Montgomery County, and Western New Jersey since 1971. Chimney and skylight flashing is among the most common findings on our fall inspection calls. Here is a clear, practical guide to understanding what flashing is, why it fails in Pennsylvania’s climate, how to check it before winter arrives, and what the correct fix looks like.
What You’ll Learn
- What chimney and skylight flashing actually is—and the different components involved
- Why flashing fails on Pennsylvania homes—and why fall and winter accelerate the damage
- How to check your flashing from the ground before winter
- What a proper flashing repair looks like—and why caulk is not the answer
- Why Bucks County homeowners trust Franco Roofing for flashing work
- Frequently asked questions about chimney and skylight flashing in Pennsylvania
What Is Chimney and Skylight Flashing?
Flashing is the metal material used to create a watertight seal at every location where the roof surface meets another building component. Wherever the continuous plane of the roof is interrupted—by a chimney, a skylight, a dormer wall, a plumbing vent, or any other penetration—there is a joint that water will find if it is not properly sealed. Flashing is the seal.
Chimney flashing specifically involves several distinct metal components working together:
- Step flashing. Individual L-shaped metal pieces woven into the shingle courses along the sides of the chimney where it meets the roof slope. Each piece of step flashing covers the nail from the course below it.
- Counter flashing. Metal embedded into the mortar joints of the chimney face that laps over the top of the step flashing, preventing water from running behind it. Counter flashing is what most people can see from the ground.
- Saddle or cricket. A peaked structure built behind a wide chimney (typically wider than 30 inches) to divert water around the chimney rather than allowing it to pond against the chimney’s upslope face. Missing crickets are a common finding on older Bucks County homes and a common source of chronic water entry.
- Apron or front flashing. Metal that runs across the face of the chimney at the downslope side, bridging the joint between the chimney base and the roof surface.
Skylight flashing involves similar components in a different geometry:
- Head flashing. Runs across the upslope edge of the skylight frame, directing water around and away from the frame.
- Side flashing. Step-flashing pieces along the sides, similar to chimney step flashing.
- Sill or apron flashing. Across the downslope edge of the skylight frame, the most common location for skylight leaks when poorly maintained.
Why Flashing Fails on Pennsylvania Homes
Flashing failure is not a sudden event. It is a gradual process that Pennsylvania’s climate accelerates in specific, predictable ways. Understanding the mechanism helps homeowners recognize the early signs before the failure becomes a winter leak.
1. Sealant Deterioration Under Freeze-Thaw Cycling
Most residential flashing systems rely on sealant at one or more points: between the counter flashing and the chimney face, at the corners of step flashing courses, at the edges of skylight frames. Those sealants—typically roofing caulk or butyl-based products—have a functional lifespan of 5 to 10 years under normal conditions. Pennsylvania’s freeze-thaw cycle compresses that lifespan. When sealant absorbs water during a fall rain and that water freezes, the expansion cracks the sealant. Repeated over multiple winters, the cracks widen, the sealant pulls away from the substrate, and what was a watertight joint becomes a water entry channel. This process is invisible from the ground until the gap is large enough to produce interior staining.
2. Counter Flashing Pulling Out of Mortar Joints
Counter flashing is embedded in the mortar joints of a masonry chimney and bent down over the step flashing below it. Over time, the mortar at these joints deteriorates—through age, freeze-thaw cycling, and the normal movement of the chimney structure. When mortar fails, counter flashing loses its mechanical anchor and begins to pull away from the chimney face. The gap that opens between the counter flashing and the masonry is a direct water pathway into the joint behind the step flashing. This is often not visible as an obvious separation from the ground, but shows as a dark stain on the chimney face or at the mortar joint line when viewed with binoculars.
3. Thermal Fatigue at Bends and Corners
Metal flashing expands when warm and contracts when cold. At bends and corners—where step flashing wraps around a chimney corner, where apron flashing meets the chimney base, where skylight flashing turns a corner—this expansion and contraction creates repeated stress at the most geometrically complex points in the metal. Over years and decades of Pennsylvania temperature swings, this thermal fatigue creates micro-cracks at bends that eventually become water pathways. Lead flashing handles this better than aluminum because lead is more ductile—it deforms under stress rather than cracking. Aluminum flashing on older Bucks County installations becomes brittle at these points and cracks more readily.
4. Galvanic Corrosion at Aluminum-Masonry Contact
Aluminum is chemically reactive with the alkaline compounds in masonry mortar and concrete. When aluminum counter flashing or apron flashing is in direct contact with mortar, a slow electrochemical corrosion process begins that degrades the aluminum from the contact surface inward. This galvanic corrosion is invisible until the metal has thinned enough to perforate—at which point the failure is typically widespread along the contact line rather than isolated. This is one of the reasons copper and lead flashing are the correct materials for chimneys on historic properties with original masonry: they do not react with mortar the way aluminum does.
5. Previous Caulk-Only Repairs That Create a False Sense of Security
One of the most common flashing findings on pre-winter inspections throughout Bucks County and Montgomery County is a chimney or skylight where a previous homeowner or low-quality contractor applied caulk over failing flashing rather than replacing the metal. The caulk provides a temporary seal that appears to solve the problem for one to three winters before cracking and failing again. When we find heavy caulk accumulation at a chimney base or skylight frame, it is almost always the sign of a flashing system that has not been properly maintained and that has accumulated multiple rounds of symptomatic treatment rather than the underlying fix.
How to Check Your Flashing Before Winter Arrives
A meaningful flashing check requires binoculars and patience—you are looking for subtle conditions from a ground position. Here is what to look for at each flashing location.
Chimney Flashing Check
Position yourself so you can see each face of the chimney clearly with binoculars. Look for:
- Counter flashing visibly lifting or gapping from the chimney face. Even a small gap along the mortar joint line is a water entry point. The gap may be easier to see after a rain when it holds a dark stain.
- Rust staining on the chimney face or on shingles below the chimney. Rust running down from flashing locations indicates corrosion of the metal component above.
- Visible caulk accumulation at the base of the chimney or along the step flashing line. Multiple layers of caulk indicate prior symptomatic repairs that did not address the underlying issue.
- Missing mortar in the joints where counter flashing is embedded. Failed mortar means the counter flashing anchor is compromised.
- Absence of a cricket or saddle behind a wide chimney. If there is no peaked structure behind a chimney that is wider than 30 inches, water is ponding against the upslope chimney face rather than being diverted.
- Step flashing visible from the end that appears to have lifted or be pulling out from under shingles. Any step flashing visible from the gable end that is no longer lying flat is a vulnerability.
Skylight Flashing Check
Position yourself to see the skylight clearly with binoculars, ideally from slightly below the skylight elevation so you can see the side and sill flashing:
- Sill (downslope) flashing that appears lifted or separated from the skylight frame. The sill is the most common skylight leak location. Any gap between the sill flashing and the frame is an active water entry point.
- Caulk at skylight frame corners that is cracked, shrinking, or pulling away. Corner seals on skylight flashing degrade earlier than the flat metal sections.
- Dark staining on shingles directly below the skylight. A stain pattern consistent with water running down from the skylight frame is a sign of active or recent drainage from a compromised seal.
- Discoloration or staining around the skylight interior frame. Staining on the interior curb or frame visible from inside the room below is a clear indicator of water entry at the flashing.
Attic Confirmation
After any significant rain, check the attic in the vicinity of your chimney and any skylights with a flashlight. Active staining or wet spots on the decking or rafters near these locations confirm water entry. Old dry staining near these locations indicates a past or intermittent issue that warrants professional assessment. Finding staining near a chimney or skylight that does not correspond to any visible shingle damage above it is one of the clearest indicators of flashing failure we see on inspections.
What a Proper Flashing Repair Looks Like—and Why Caulk Is Not the Answer
This distinction matters enough to be direct about it: applying caulk to a failing flashing system is not a repair. It is a delay. The underlying metal has failed—through sealant deterioration, mortar failure, thermal cracking, or corrosion—and covering the failure with caulk does not restore the metal’s integrity. It fills the gap temporarily while the condition that produced the gap continues to progress. Within one to three winters, the caulk cracks, the gap reopens, and the cycle repeats.
A correct flashing repair for a chimney involves removing the failed counter flashing, cleaning out the deteriorated mortar at the joints, re-cutting the mortar reglets if necessary, installing new counter flashing with proper mechanical embedding, and sealing with a flexible, non-organic, mortar-compatible sealant. For step flashing at the sides of the chimney, individual pieces that have lifted or corroded are replaced in sequence, woven into the adjacent shingle courses as original installation requires.
Skylight flashing repair in most cases involves removing the failed flashing components, inspecting the skylight frame and curb for any damage that has occurred from water entry, and installing new flashing to the skylight manufacturer’s specifications. On older skylights where the frame itself has deteriorated from years of water exposure, flashing repair without addressing the frame condition produces incomplete results.
Material selection matters. On historic masonry chimneys—common on Bucks County properties throughout Doylestown, New Hope, and Solebury—copper or lead flashing is the correct replacement material. Aluminum’s reactivity with mortar makes it a poor choice for direct masonry contact. On standard residential installations, high-quality aluminum flashing is adequate when properly installed and maintained. The choice of flashing material is a topic worth discussing with a roofing specialist who understands both the material properties and the specific construction of the chimney or penetration being addressed.
One more practical point: flashing repair is most cost-effective when done before winter rather than as emergency work during winter. A properly executed chimney flashing replacement in October takes an hour or two on a dry day and costs a fraction of the emergency call during a January storm, the interior damage remediation that follows, and the rescheduled repair that must happen anyway once the weather breaks.
Why Bucks County Homeowners Trust Franco Roofing for Flashing Work
Flashing is where roofing expertise separates from roofing adequacy. Anyone can install shingles on a standard residential slope. Correctly integrating step flashing with a historic slate field, embedding counter flashing in masonry mortar joints, fabricating a lead saddle for a wide chimney on a 1920 colonial in Doylestown—these are the kinds of tasks that require both technical knowledge and hands-on experience. They are also the tasks most likely to be done incorrectly when a general contractor or low-quality crew takes on roofing work as a sideline.
Franco Roofing has been doing flashing work on Bucks County and Montgomery County properties since 1971. We understand the material properties of copper, lead, and aluminum in the context of Pennsylvania’s specific climate and the masonry construction common on the region’s historic homes. We know the difference between a flashing that needs a targeted reseal and one where the metal itself needs to be replaced. And we tell homeowners which is which rather than recommending the more expensive option by default.
Franco Roofing is fully licensed in Pennsylvania (PA #PA018056) and New Jersey (NJ #13VH07058000), carries a $2,000,000 general liability policy and workers’ compensation, and backs all repair and installation work with our 10-year workmanship warranty. 80% of our business comes from referrals from Bucks County and Montgomery County homeowners who have worked with us and sent their neighbors our way.
Frequently Asked Questions
How do I know if my chimney is leaking from the flashing or from cracked masonry?
Both can produce interior staining, but there are signs that help distinguish them. Flashing failure tends to produce staining directly adjacent to the chimney—on the ceiling or wall immediately below the chimney base, or at the chimney’s intersection with the roof. Masonry failure (cracked crowns, spalled brick, failed mortar joints higher on the chimney) tends to produce staining further inside the fireplace or on the interior chimney wall itself. A professional inspection can definitively identify which is the source and often reveals both when a chimney has been neglected for multiple seasons.
Can I reseal my chimney flashing myself with caulk?
Applying roofing caulk to a minor gap at a flashing edge is something some homeowners do as a temporary measure, and it may hold through one winter if the underlying metal is otherwise in acceptable condition. It is not a substitute for professional assessment of what caused the gap, and it will need to be redone every two to three years at best. If the flashing itself is corroded, the metal has separated from the masonry anchor, or the step flashing is lifted, caulk does not address any of those conditions. It delays the appearance of the problem without fixing it.
How long does chimney flashing typically last in Pennsylvania?
The lifespan depends significantly on material. Aluminum flashing, which is the most common residential installation, typically lasts 20 to 30 years before the metal itself needs replacement—though the sealants used at joints need attention every 5 to 10 years. Lead flashing lasts 50-plus years when properly installed and has better compatibility with masonry. Copper flashing has a similar long lifespan. On many older Bucks County homes, we find original aluminum flashing from the 1990s that is at or past the end of its useful metal life and showing the corrosion and cracking that requires replacement rather than reseal.
My skylight has never leaked. Do I still need to check the flashing?
Yes. Skylight flashing failure is incremental—the seal degrades gradually before the first interior evidence of water entry appears. By the time you notice a stain on the ceiling below the skylight, water has typically been entering the structure for one or more seasons, traveling along the framing before finding a place to drip. A pre-winter inspection that catches a cracked corner seal or lifted sill flashing is catching the problem while it is still a straightforward repair rather than a repair plus interior remediation.
How much does chimney or skylight flashing repair cost in Bucks County?
A targeted flashing reseal—addressing specific sealant failures while the underlying metal is still in good condition—typically runs a few hundred dollars. A full chimney counter flashing replacement involves more labor and materials and runs higher depending on the chimney size, material chosen (aluminum vs. copper or lead), and whether a cricket needs to be built or repaired. Skylight flashing replacement depends on the skylight size and accessibility. Franco Roofing provides free, written estimates with no obligation for all flashing work throughout Bucks County and Montgomery County.
Should I replace my flashing when I replace the roof?
Yes, in most cases. A new roofing installation over old flashing creates a lifespan mismatch—the new shingles may perform for 20 to 25 years while the old flashing fails in 5 to 10. Standard roofing industry practice is to replace all step flashing, counter flashing, and valley flashing at the time of a roof replacement. Retaining original flashing at re-roofing time is a cost-cutting approach that typically produces water entry calls within a few years of the new roof installation.
Does Franco Roofing do flashing-only repairs, or only full roof work?
We do flashing repairs as standalone work when the rest of the roofing system is in acceptable condition. Addressing a specific flashing failure without replacing a roof that has years of remaining life is both appropriate and cost-effective, and it is exactly the kind of targeted repair we recommend when it is the right call for the homeowner. Call (215) 345-1828 to schedule a free assessment and we will tell you exactly what the roof shows and what it needs.
Next Steps: Check the Transitions Before Winter Checks Them for You
Every winter, Bucks County and Montgomery County homeowners call us after discovering water entry at a chimney or skylight that they had no idea was coming. In most cases, the flashing that produced the leak had been showing visible signs of deterioration for a season or more. A 20-minute binocular inspection this fall and a professional assessment where it’s warranted is the difference between a pre-winter repair and a mid-January emergency call.
Key takeaways:
- Flashing failure at chimneys and skylights causes more winter water entry calls than shingle failure in Bucks County
- Sealant deterioration and counter flashing pullout from mortar are the two most common failure modes
- Caulk over failing flashing delays the problem by one to three winters; it does not fix it
- A pre-winter flashing repair costs a fraction of what post-storm emergency response plus interior remediation costs
Contact Franco Roofing, Inc. for a free flashing inspection and estimate:
- Doylestown: (215) 345-1828
- Newtown: (215) 860-1550
- Pipersville: (215) 766-0266
- Email: francoroofinginc@verizon.net
- Website: francoroofinginc.com
We respond within 24 hours and can typically schedule inspections within one week. Emergency service available 24/7. Serving Bucks County, Montgomery County, and Western New Jersey since 1971.